
This is part of my mini Ghost series, where I document the problems I ran into during the migration and how I solved them. You can find the other posts at the bottom.
Background
While I was rewriting my theme to be compatible with Ghost 2.X, I had my new ghost instance running on my temporary domain cjx3711.com. While it was there, was manually copying my posts over from my beta ghost instance running on chaijiaxun.com. (My previous version was way too old to automatically migrate).
The cool thing is that it automatically converted markdown to the mobiledoc format upon pasting which meant migration went smoothly. That is, until I switched the blog back to my primary chaijiaxun.com domain.
The Problem
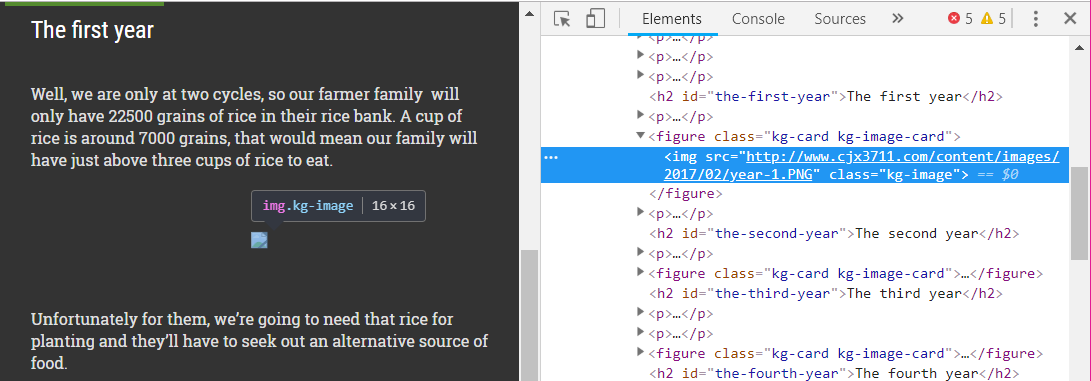
At first, nothing was even broken since my images were still hosted on the other domain, but the links to all my images looked like this.
<img src="http://www.cjx3711.com/content/images/2017/02/year-1.PNG" class="kg-image">
Of course, I eventually shut down that ancient ghost instance and then everything broke.
To make matters worse, ghost does not provide any way (that I know of) to update the URL of an image. If I wanted to swap out the image, I was forced to re-upload the images by selecting them off my computer.
That meant that I had to:
- Download the images from my ghost/content/images folder to my machine
- Re-upload all the images in their respective locations
- Feel sad about the duplicated images on my server
I had no intention of doing that.
A Solution
First of all, I have to point out that I am using a SQLite 3 database. That means that the database is stored as a file which is super convenient but not terribly efficient. If you are using a SQL database like a normal person, your steps will be a bit different from mine, but the idea still stands.
My solution was to do the next most logical thing; directly edit the database.
This process was not even that hard, I simply had to download my database file, edit the rows, and upload it again.
Looking into the database
Download the database file
The first thing to do was to download the database file locally. Do this in whatever way you want.
rsync -azP jiaxun@chaijiaxun.com/<path_to_ghost>/content/data/ghost.db .
Note the .!Open the database
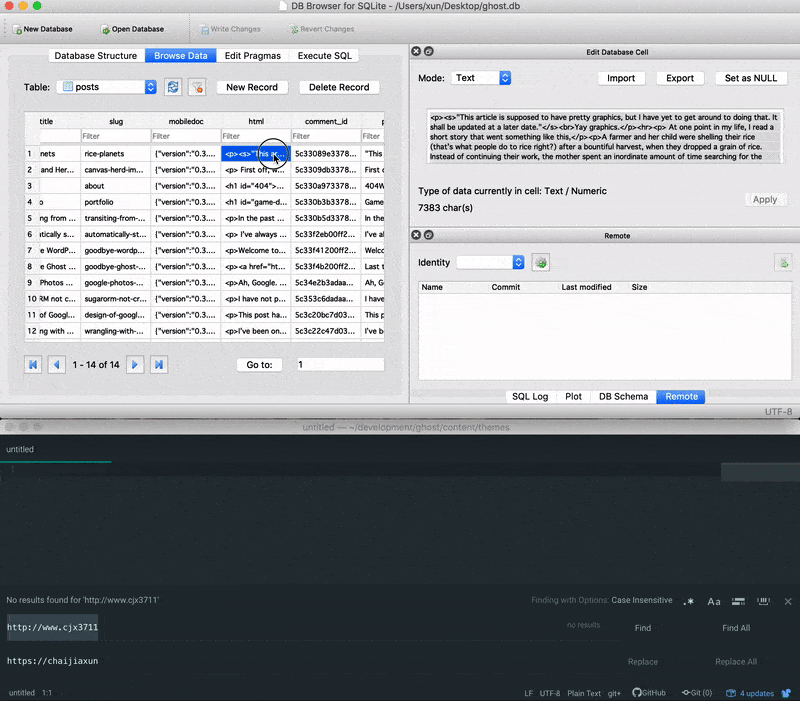
Next, I needed to find a way to open the database. DB Browser for SQLite is a free software that does the job well enough. The user interface could use work, but it performs all the tasks I required of it.
Figure out the columns I needed to change
Now we look into the ghost database schema. It is not that hard to figure out where the posts are and what to update.
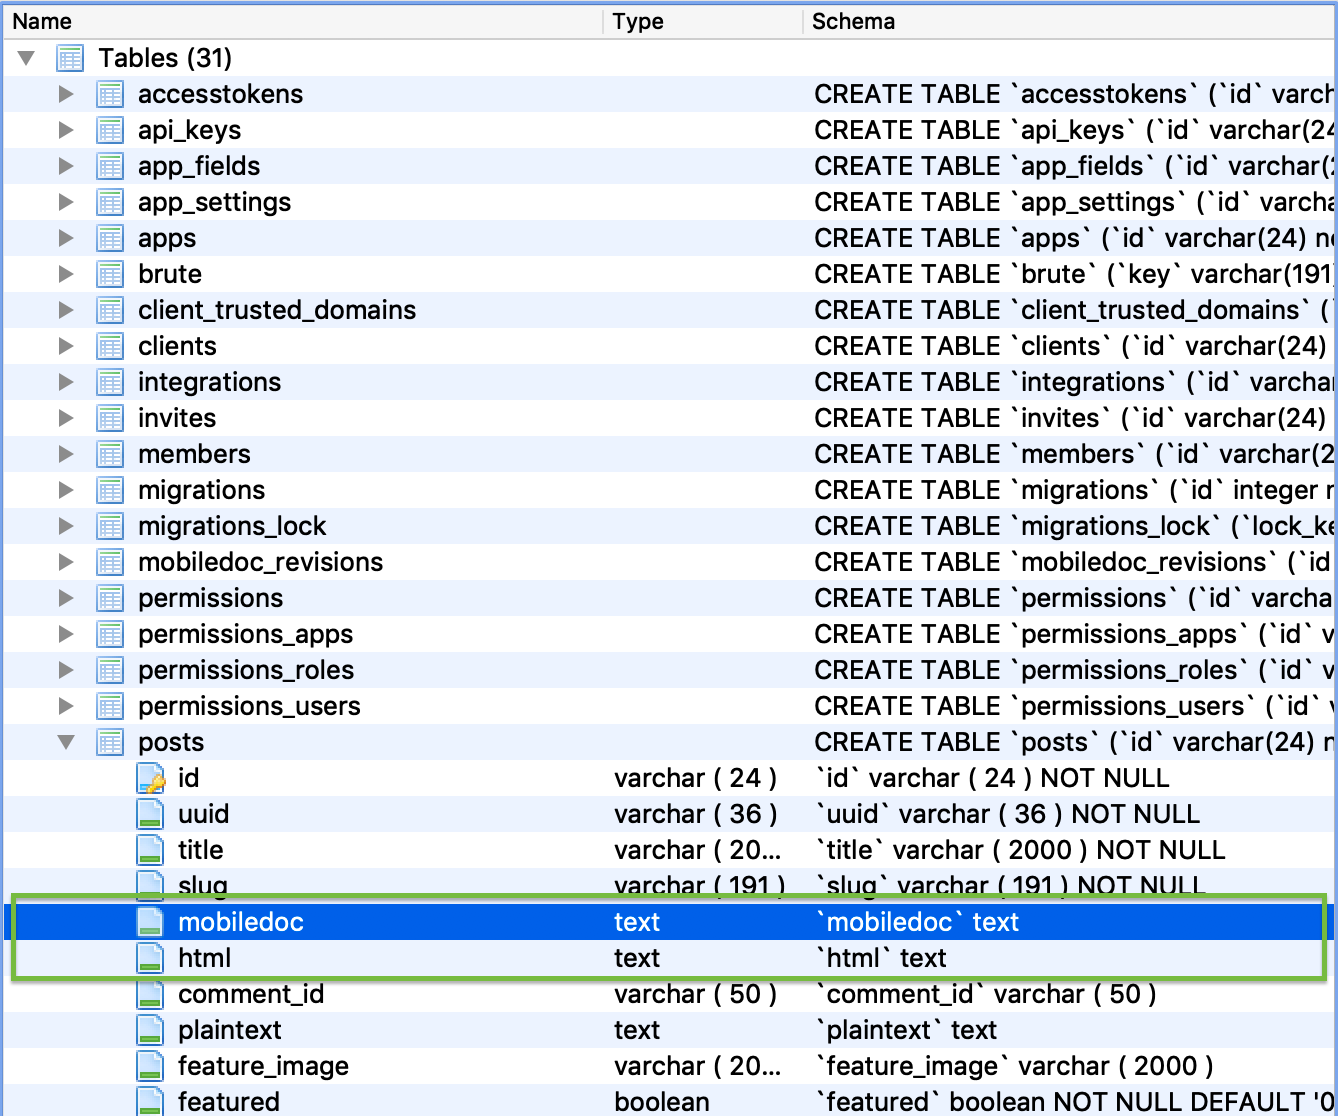
Above, we see a column named html that is very likely where the blog stores the content. But I know that Ghost 2 uses the Koenig mobiledoc editor, so that mobiledoc column is also suspicious. Lastly there’s a plaintext column which also looks like it stores the data.
As we can see above, we really just need to edit the mobiledoc and html columns. I suspect that ghost converts the mobiledoc format to html and plaintext upon saving your post so it doesn’t have to do that each time someone visits your site. Either way, I’ll just update both these columns. I’m not bothering with plaintext because it appears that it strips out all images and links anyway.
Updating the data
Change the columns
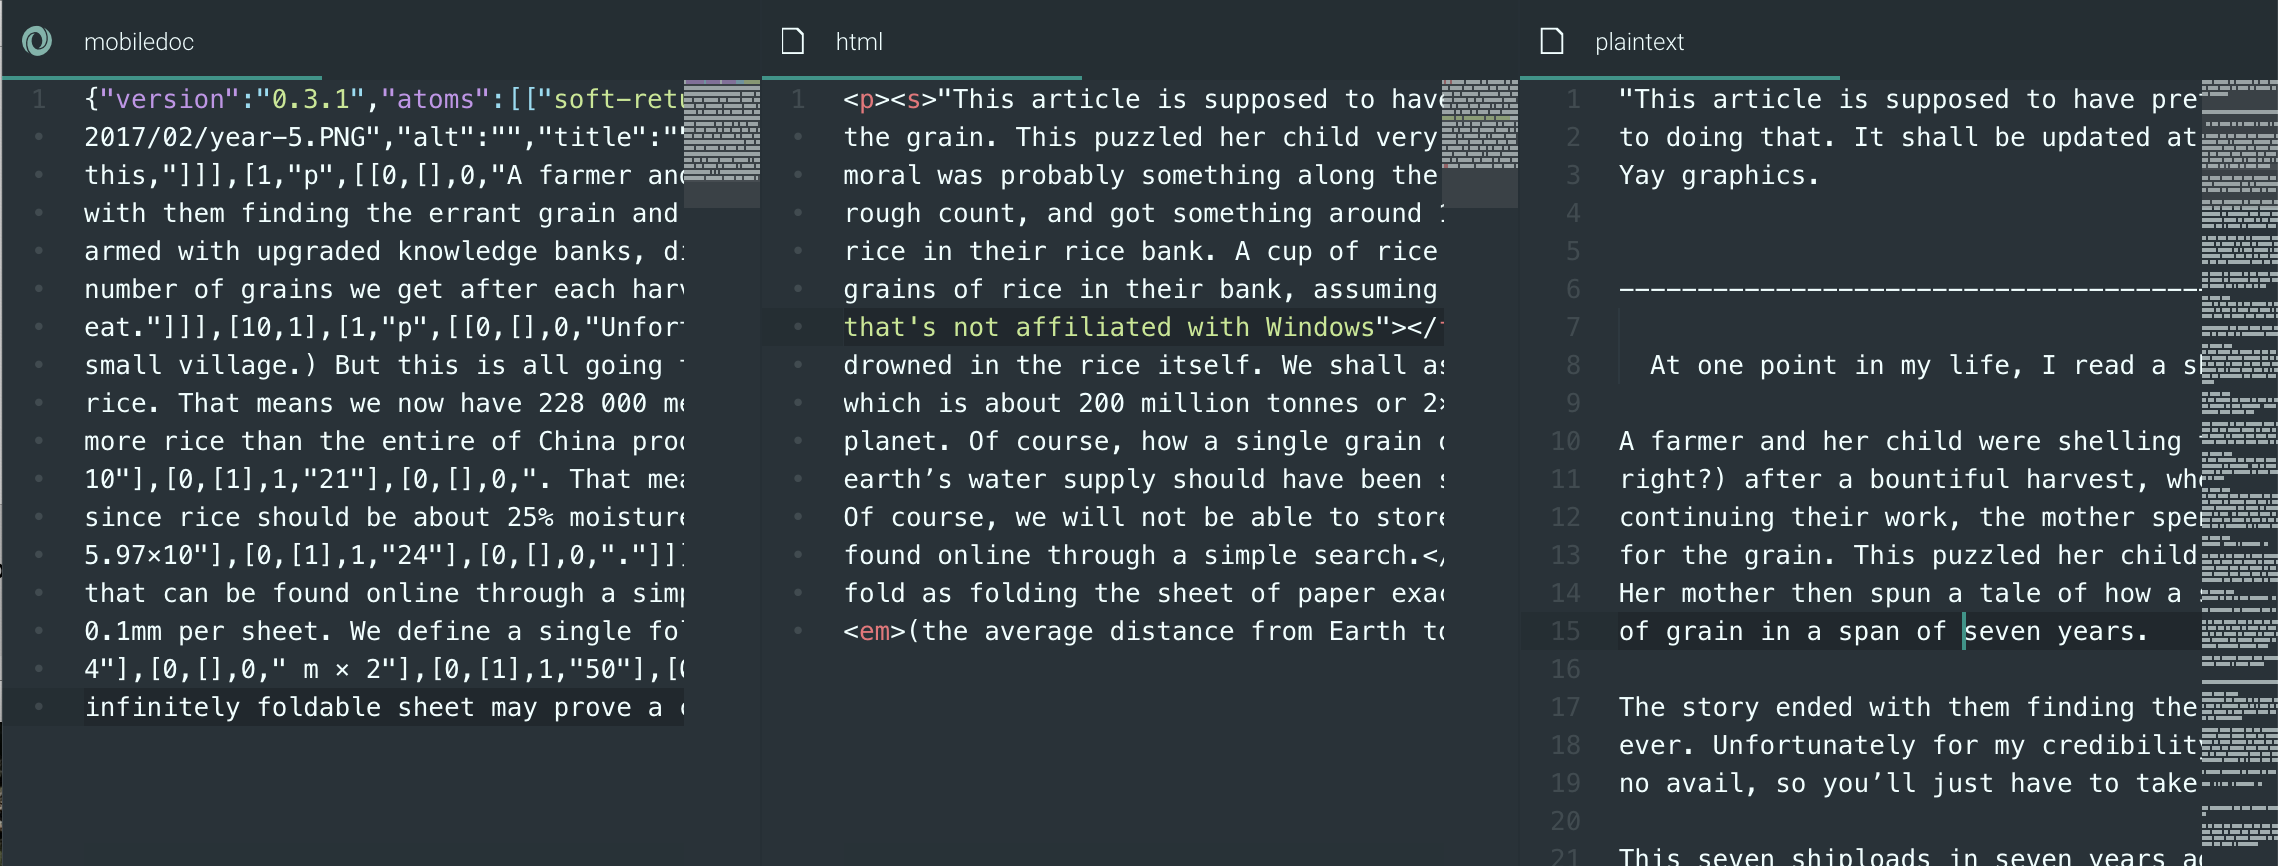
This part was easy. I copied the data out into my editor (I use atom) and ran the find and replace command to replace all instances of http://www.cjx3711 with https://chaijiaxun.
If you are using SQLite Browser, don’t forget to hit the apply button after each paste and the Write Changes button at the top once you are done with the whole file.
Putting it back
Upload the database file
Now all we have to do is to put the file back. Again, I used the rsync command, but you could use anything else like ftp or scp.
rsync -azP ghost.db jiaxun@chaijiaxun.com/<path_to_ghost>/content/data/ghost.db
Set permissions if required
If you don’t set the permissions, everything will still seemingly work. But when you try to change anything on the blog, you will be met with this error that screams in your face.
So to set the permissions, just run sudo chown ghost:ghost content/data/ghost.db from your ghost directory.
Restart ghost
For good measure. Don’t think you have to, but no harm in doing so.
ghost restart
Another Solution
I am aware that this is simply SQL, and I’m pretty sure I could have run an SQL statement to find and replace the strings, but I was too lazy to figure it out.
Update: Well, I figured it out googled it.
So it turns out that all that hassle above was for naught. I simply needed to run this handy code snippet and it does all the replacement for me.
update posts
	set mobiledoc = replace(mobiledoc, 'http://www.cjx3711', 'https://chaijiaxun'),
	    html = replace(html, 'http://www.cjx3711', 'https://chaijiaxun' )
where slug = ‘rice-planets’
The last line is simply there if you want to run it on a single row. Simply remove the last line and you can update your whole database in a flash.
You can either run this query directly in the terminal if you have a direct connection to the database, or you can use DB Browser for SQLite to execute the query. After that, just save the file and copy your database back to your server. Or if you were using MySQL, better yet, you’re done!
In Conclusion
I don’t know what to conclude here. Don’t switch domains willy nilly I suppose. Either that or you could simply write and nginx script that does a redirect from your old domain to your new one. This is but one of many solutions to a problem such as this.
tl;dr
If your images are all broken because you changed your domain, or if you want to just update images without re-uploading them, directly edit the database.